
ESLint and Enforcing Code Quality
A Comprehensive Guide to Setting Up ESLint and Enforcing Best Practices in Your GitHub Repository


This article aims to guide you through the process of setting up ESLint, a powerful tool for enforcing code style and ensuring consistent and professional-looking code across your projects. Whether you're new to ESLint or looking to enhance your workflow, this article will take you through the steps of configuring ESLint, adding pre-commit hooks for automatic linting, and implementing GitHub Actions to check code quality before merging.
Setting up ESLint
Adding Pre-commit Hooks
Lint Checking with GitHub Actions
Setting up ESLint
If you're unfamiliar with ESLint, it's a tool used to implement code style, and adopting it can make your code more consistent and professional. To get started, visit the official ESLint website. The setup involves configuring the style and rules you want to follow:
npm init @eslint/config
You will be prompted with various questions you can choose according to your project. I am using it for node and using the style guide given by Google the prompts would be answered as follows.
@eslint/create-config@0.4.6
Ok to proceed? (y) y
✔ How would you like to use ESLint? · style
✔ What type of modules does your project use? · commonjs
✔ Which framework does your project use? · none
✔ Does your project use TypeScript? · No / Yes
✔ Where does your code run? · browser
✔ How would you like to define a style for your project? · guide
✔ Which style guide do you want to follow? · google
✔ What format do you want your config file to be in? · JavaScript
For testing, if your linting is set properly run the below commands to show the parts of code that are not following the rules defined by ESLint, adding --fix at the end updates all the errors it can solve automatically.
npx eslint filename.js
npx eslint filemane.js --fix
Now your linting is complete but running these commands every time manually is so non-dev and there are chances you may forget to lint before committing the changes, the chances of something like this happening increase when you are working with multiple devs.
You can add a pre-commit that runs lint checks before committing it to the project.
Setting up pre-commit for linting
For setting up pre-commit we would use Husky, it is a tool that allows you to run actions on specific git hooks to know more about what it is visit https://typicode.github.io/husky/
Run the following command to setup Husky to your repo
npx husky-init && npm install
You will notice file changes. Like the "prepare": "husky install" script in package.json. Update your package.json to look something like this: (add lint and lint-fix)
"scripts": {
    ...
    "lint": "eslint ./",
    "lint-fix": "eslint ./ --fix",
    "prepare": "husky install"
},
....
"devDependencies": {
    ...
    "husky": "^8.0.3"
}
Modify the .husky/pre-commit file:
#!/usr/bin/env sh
. "$(dirname -- "$0")/_/husky.sh"

npm run lint
Now, attempting to commit code without linting will result in an error, preventing commits that do not adhere to the defined rules.
$ git add .
$ git commit -m "test"

> sop@1.0.0 lint
> eslint ./

/Users/Harshal/Documents/filename.js
  11:1  error  Expected indentation of 2 spaces but found 8  indent

✖ 1 problem (1 error, 0 warnings)
  1 error and 0 warnings potentially fixable with the `--fix` option.
Is this the final validation? NO cause the users can still bypass this using --no-verify , That is why we need a way to check that if someone is merging code to the main branch in GitHub it should be linted.
git commit -m "commit message" --no-verify
Lint Checking with GitHub Actions
To ensure that all code merged into the main branch is linted, create a GitHub Actions workflow. Create a file .github/workflows/code-quality-checks.yml with the following content:
root/
├── .github/
│ └── workflows/
│     └── code-quality-checks.yml
Add the below code inside the file .github/workflows/code-quality-checks.yml
name: Run Code quality checks

on: pull_request

jobs:
  eslint:
    name: eslint runner
    runs-on: ubuntu-latest
    steps:
      - uses: actions/checkout@v3
      - name: install dependencies
        run: npm install eslint
      - name: Run ESLint on modified code
        run: npx eslint ./
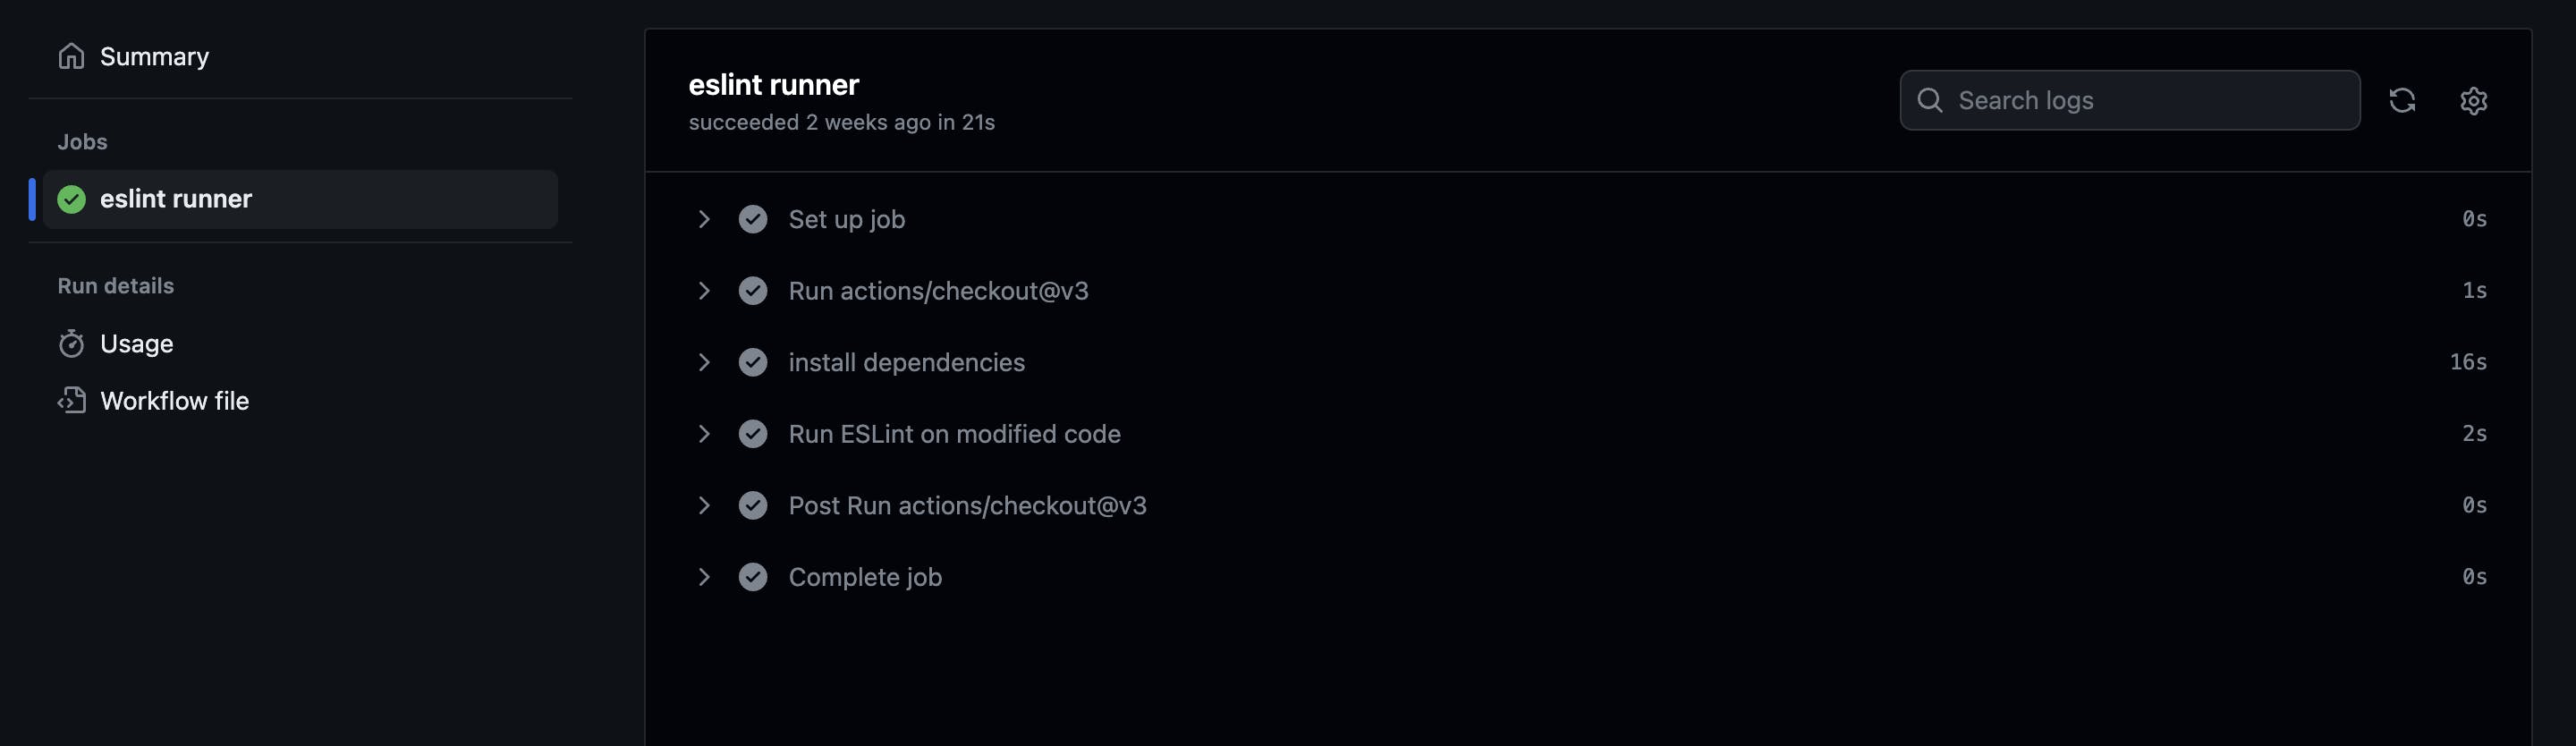
This workflow checks if the code in a pull request is properly linted, blocking merges that don't adhere to the styling rules. If the linting is passed checks will be shown succeeded like below images.

In conclusion, by following these steps, you've successfully set up ESLint in your repository and enforced code quality through pre-commit hooks and GitHub Actions. If you encounter any issues or have suggestions, feel free to let me know. Thank you for reading!